Tone mapping
In the default linear workflow, used by Maya (prior to v2022) and Nuke, linear renders are viewed through an sRGB 2.2 gamma curve. In 2012 Jeremy Selan issued a VES White Paper entitled Cinematic Color: From Your Monitor to the Big Screen that proposed improvements to the traditional linear workflow that revolutionized the approach of the VFX industry. Perhaps the most significant of the improvements proposed in the white paper was the use of a “filmic” view transform.
As the white paper explained, viewing an image through a 2.2 gamma can result in images with low apparent contrast and poor highlight rendition (i.e. highlight clipping). In contrast, using an S-shaped “film emulation” curve, typical of what we see in cameras, yields a pleasing appearance of contrast, with well balanced highlight and shadow details. Additionally, the filmic view transform does not simply clamp values above 1.0 as a gamma curve does, but preforms tone mapping. Compare below this RED camera footage without tone mapping (the default Nuke sRGB view) and the same image with filmic tone mapping.
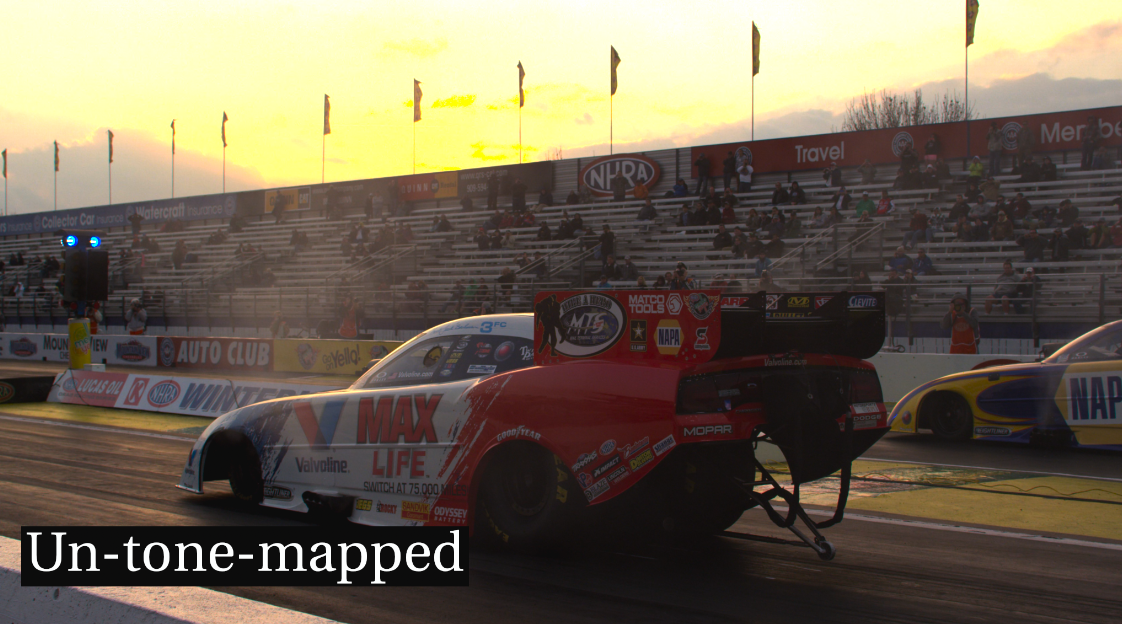

Specifically for ACES that means linear values from 1 to 16 (4 exposure stops) are re-mapped into the output range 0.8 to 1, and only values above 16 (16.3 to be more precise) are clipped. Observe the difference that makes in the sky in the images above.
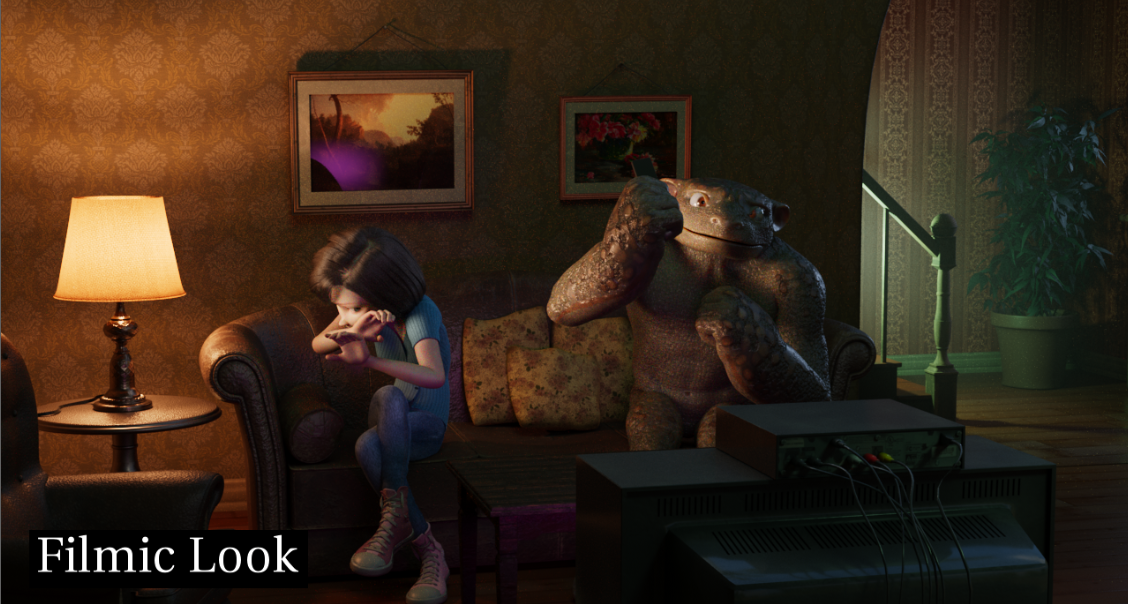
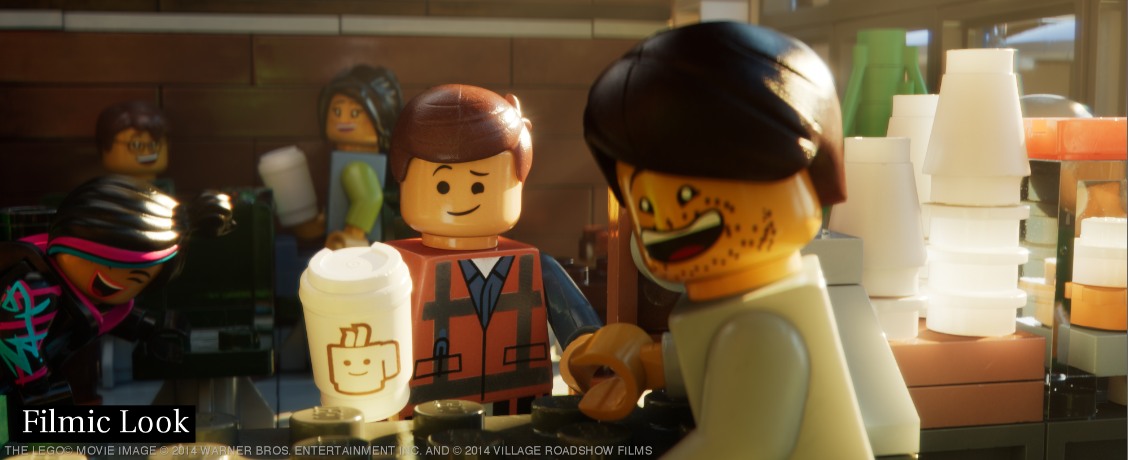
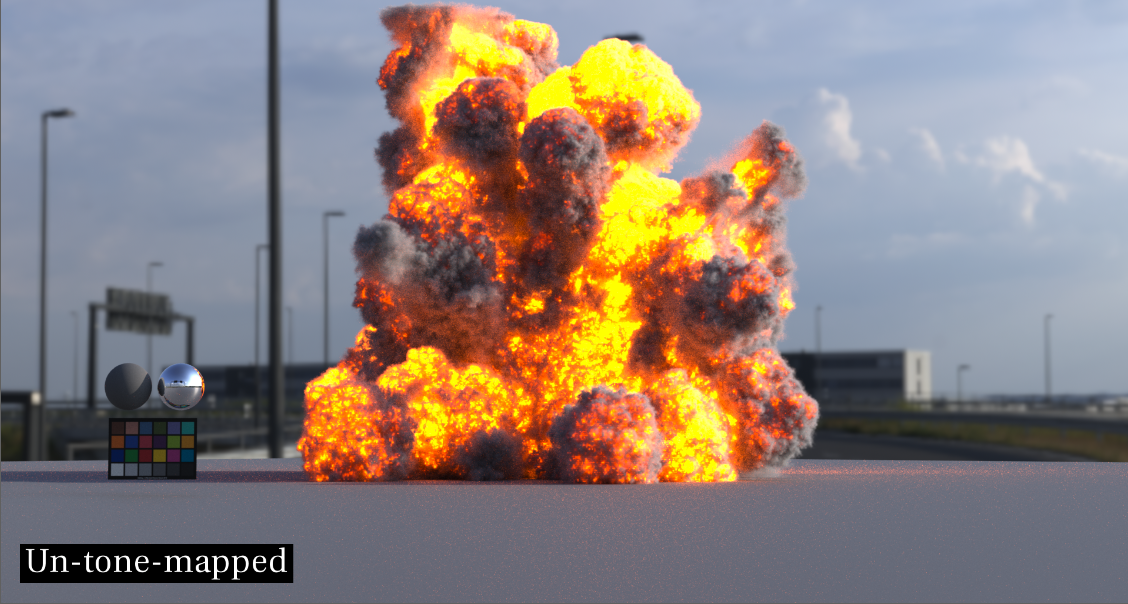
This is tremendously important not only for photos, but also for photorealistic renders. Compare these renders without tone mapping and with. Note the low-contrast look of the un-tone-mapped images, as well as how values over 1 (a lamp, sunlight, fire) will clip in a very unappealing way.
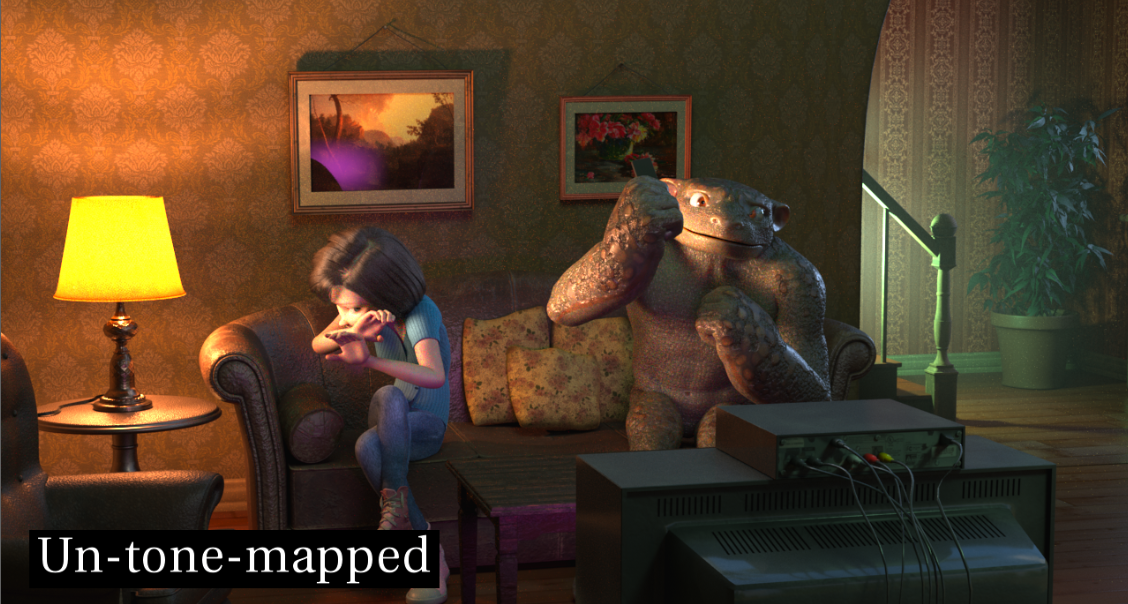


To do physically based rendering we need to see the render in the way a camera sees a scene, which is through an s-shaped tone curve. Otherwise, when values clip as soon as they go over 1 (as they do with an sRGB gamma curve like the one applied in the native viewer for Nuke, as well as in versions of Maya prior to v2022) this leads artists to compensate by making the lights and shader colors unnaturally dim so they don’t get unwanted clipping. Making the lights unnaturally dim causes many things in the render (GI bounce, etc.) to not work properly because the light values are not realistic, meaning the physically based render is not being given physically based light values.
With tone mapping, rather than the artist needing to compensate and fight with the render, they can give their lights real-world values and the physically-based rendering gets the right amount of light to do its stuff like GI bounces. It also means that things in comp like optical effects (bokeh, motion blur, depth of field, bloom, atmospherics) also work properly because they are given the proper light values. In short, it makes the render behave more like a photo camera so artists can get photorealistic renders.
Where ACES comes into the picture is where we wish to marry CG images to film. As explained above, it’s essential that we view renders through a tone mapped transform to make them look photoreal, and we also want to view the film footage through that same filmic view transform so they can match. ACES provides that unified view transform, available in pretty much all software programs – from film set, to edit, to VFX, to DI so there is consistency of artistic vision through every step of the film making process.